Configure Azure Native Integration
Azure Native Integration offers a fast and efficient way to sync your Azure data with Logz.io, providing visibility and allowing you to monitor and troubleshoot your environments. With Azure Native Integration, you can monitor the performance and health of your systems in real-time, and quickly identify the root cause of issues and problems.
Azure may charge additional fees for using this integration. Read more about Azure API costs.
Set up Azure Native Integration in Azure
Create a new app in Azure
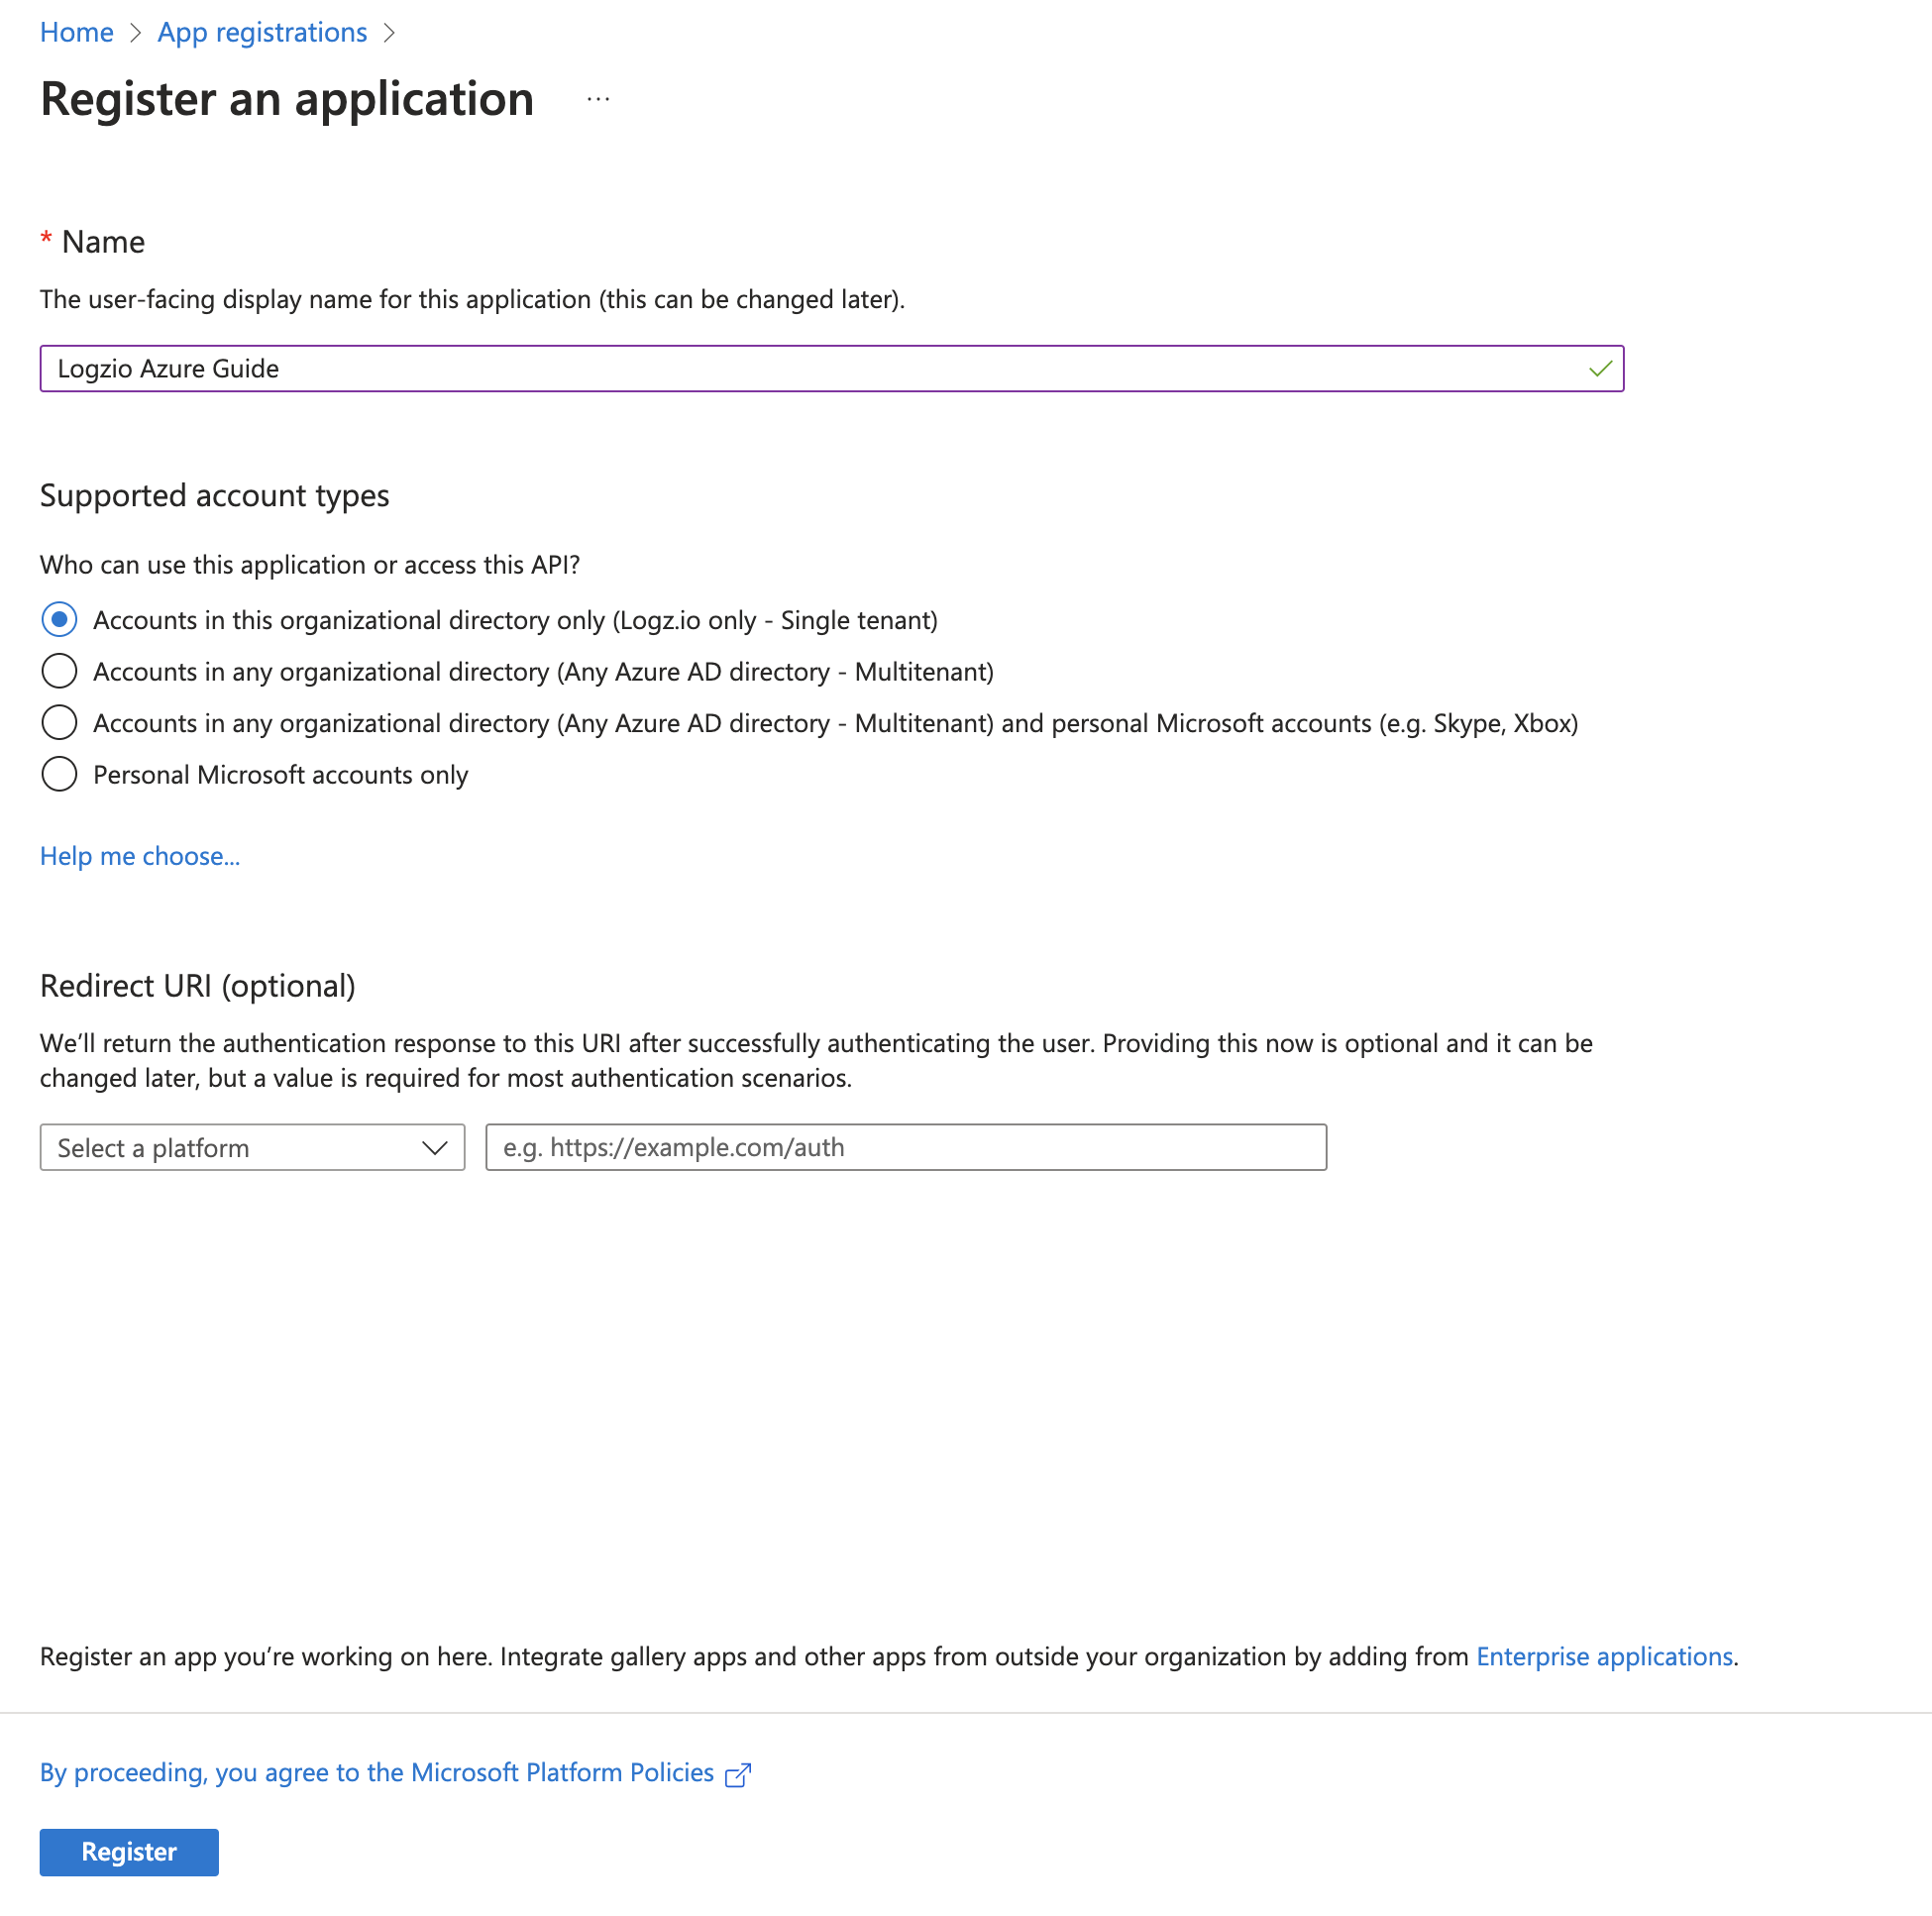
Enter your Azure portal and navigate to App registrations > New registration.
Give your app a name, choose Accounts in this organizational directory only (Single tenant), and click the Register button.
Create a certificate
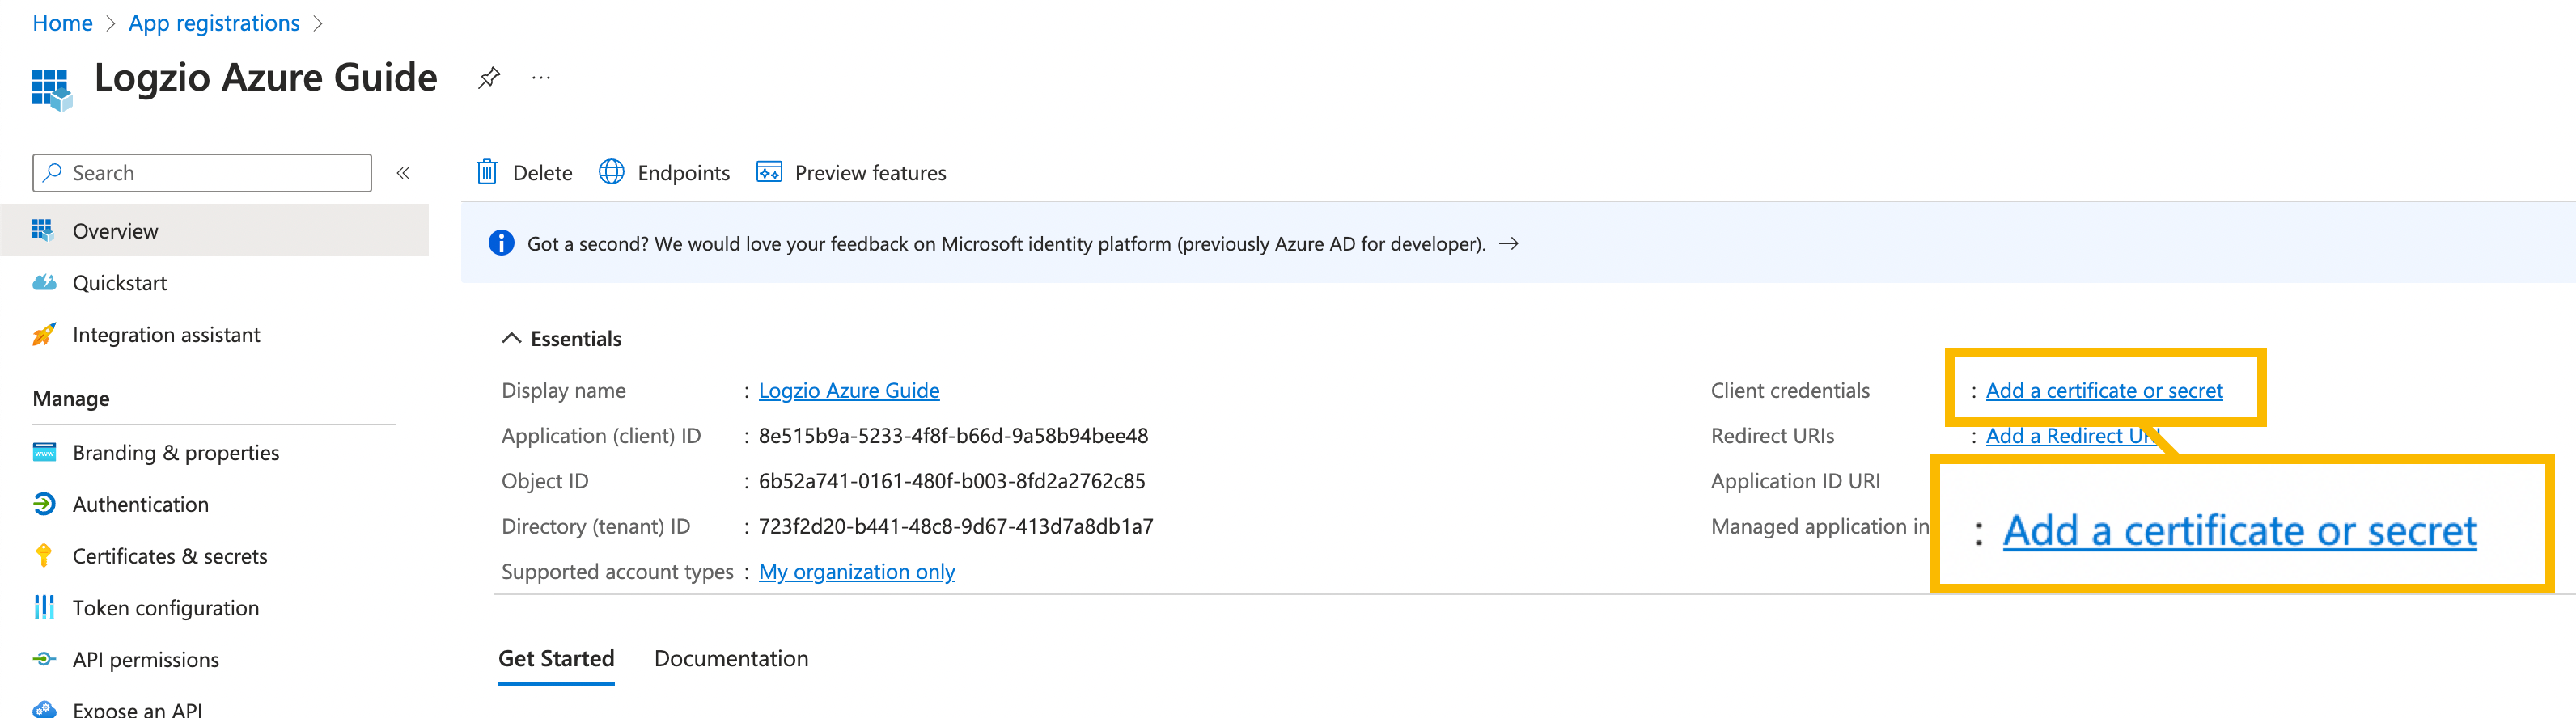
In your main app screen, click on Add a certificate or secret.
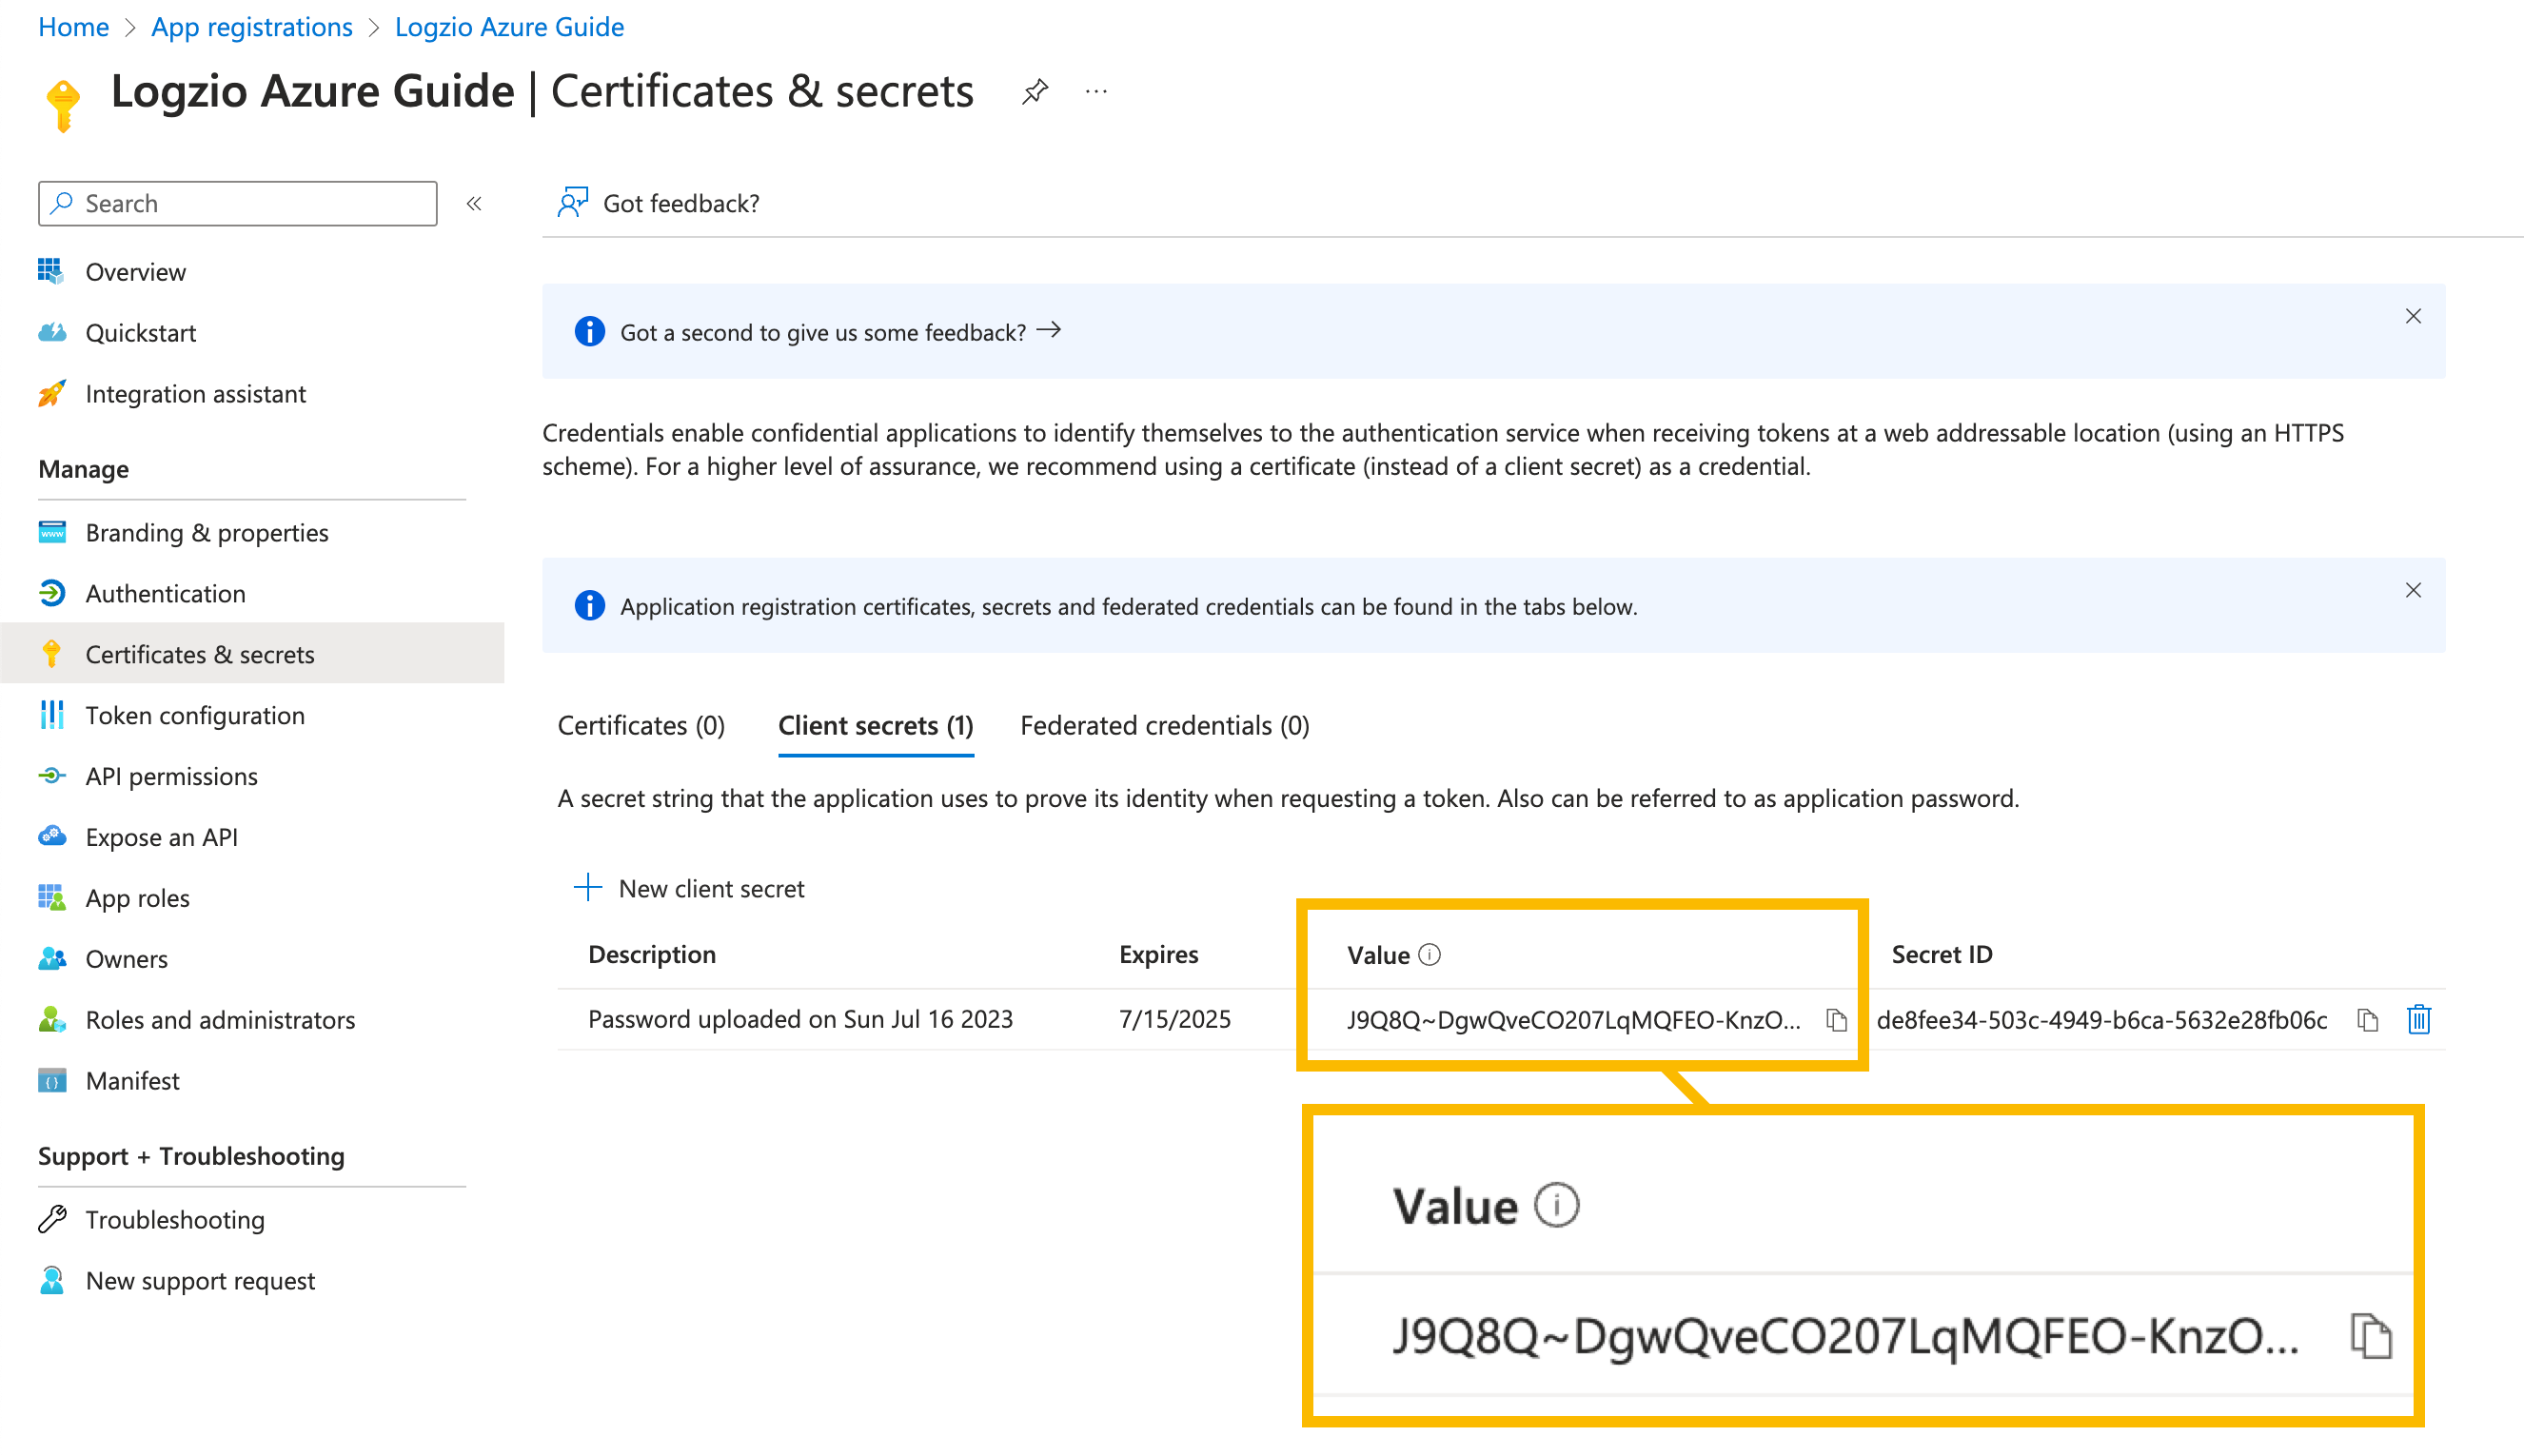
Next, create a New client secret. Give it a description and choose the expiration date, such as the 730 days option. Click Add to create the secret.
Copy your secret's Value and save it for later use. This is needed to complete the setup process with Logz.io.
Client secret values cannot be viewed except immediately after creation. Be sure to save the secret when created before leaving the page. If you didn't keep the value, create a new client secret to continue the setup process.
Assign a role
Navigate to Subscriptions and choose the relevant Azure subscription. Inside, click on Access control (IAM) > Role assignments tab.
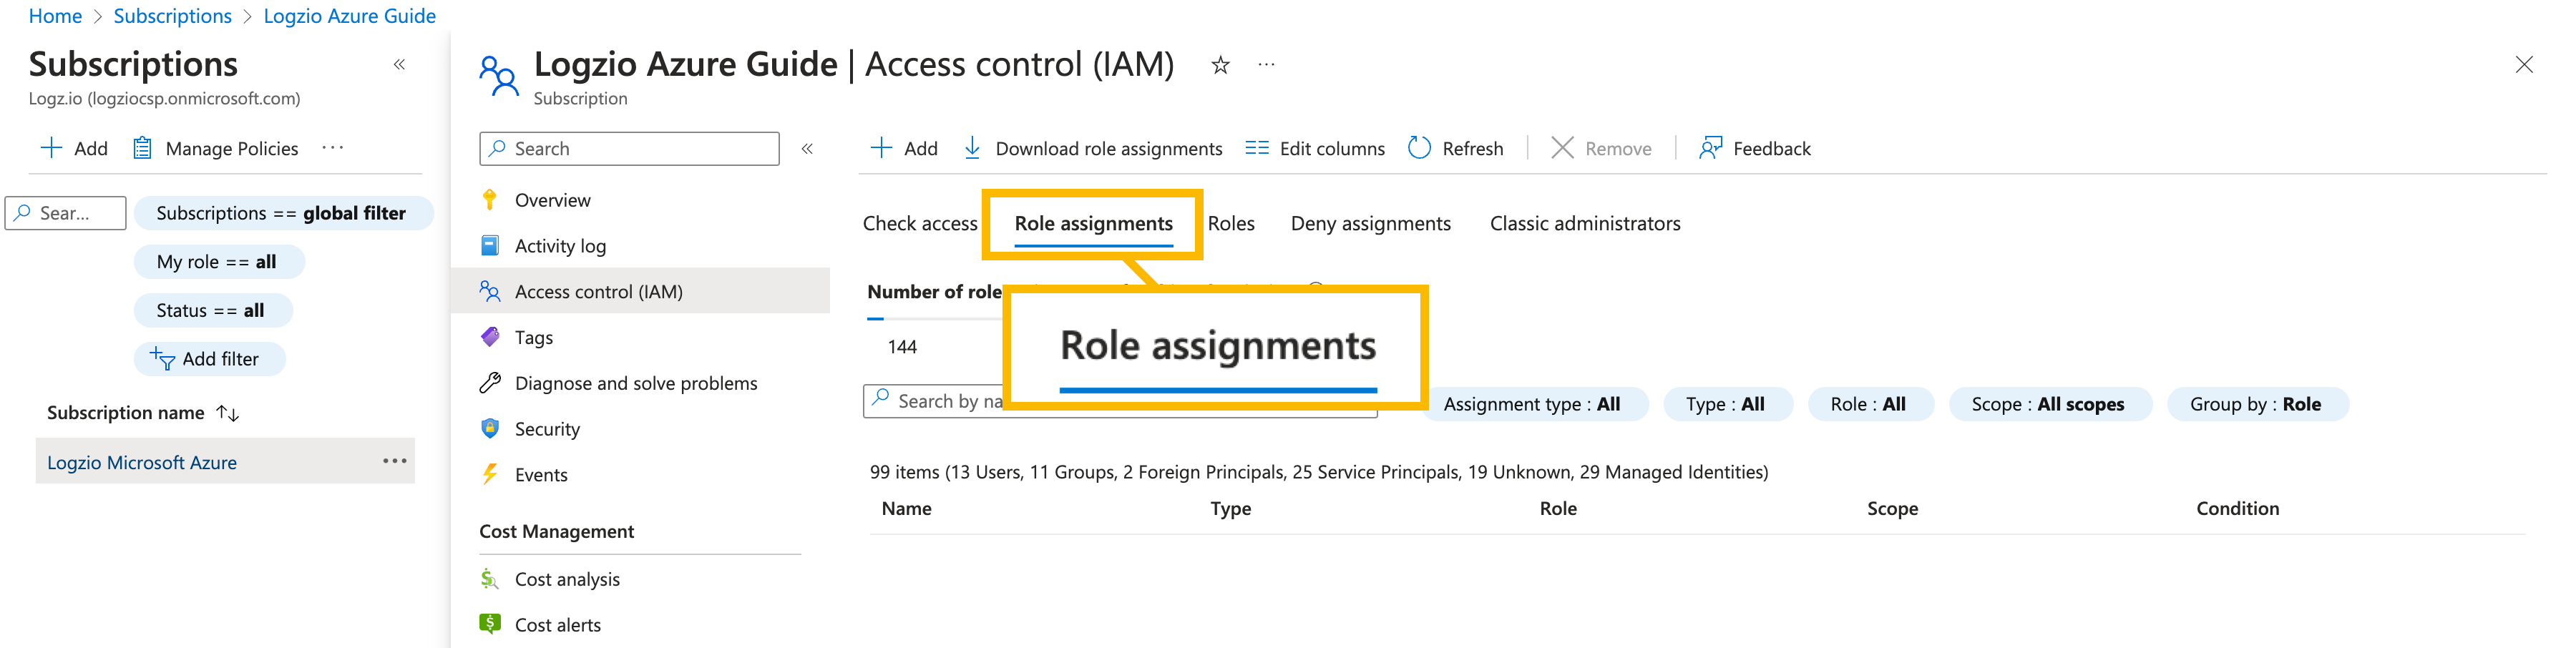
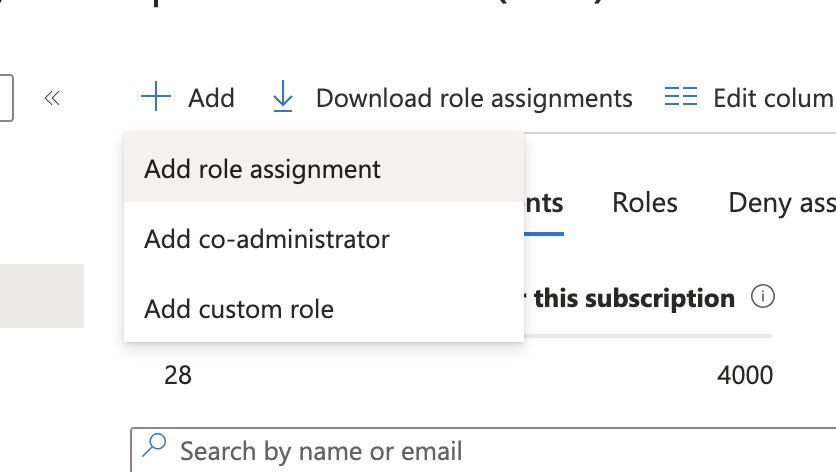
Click on Add and choose Add role assignment.
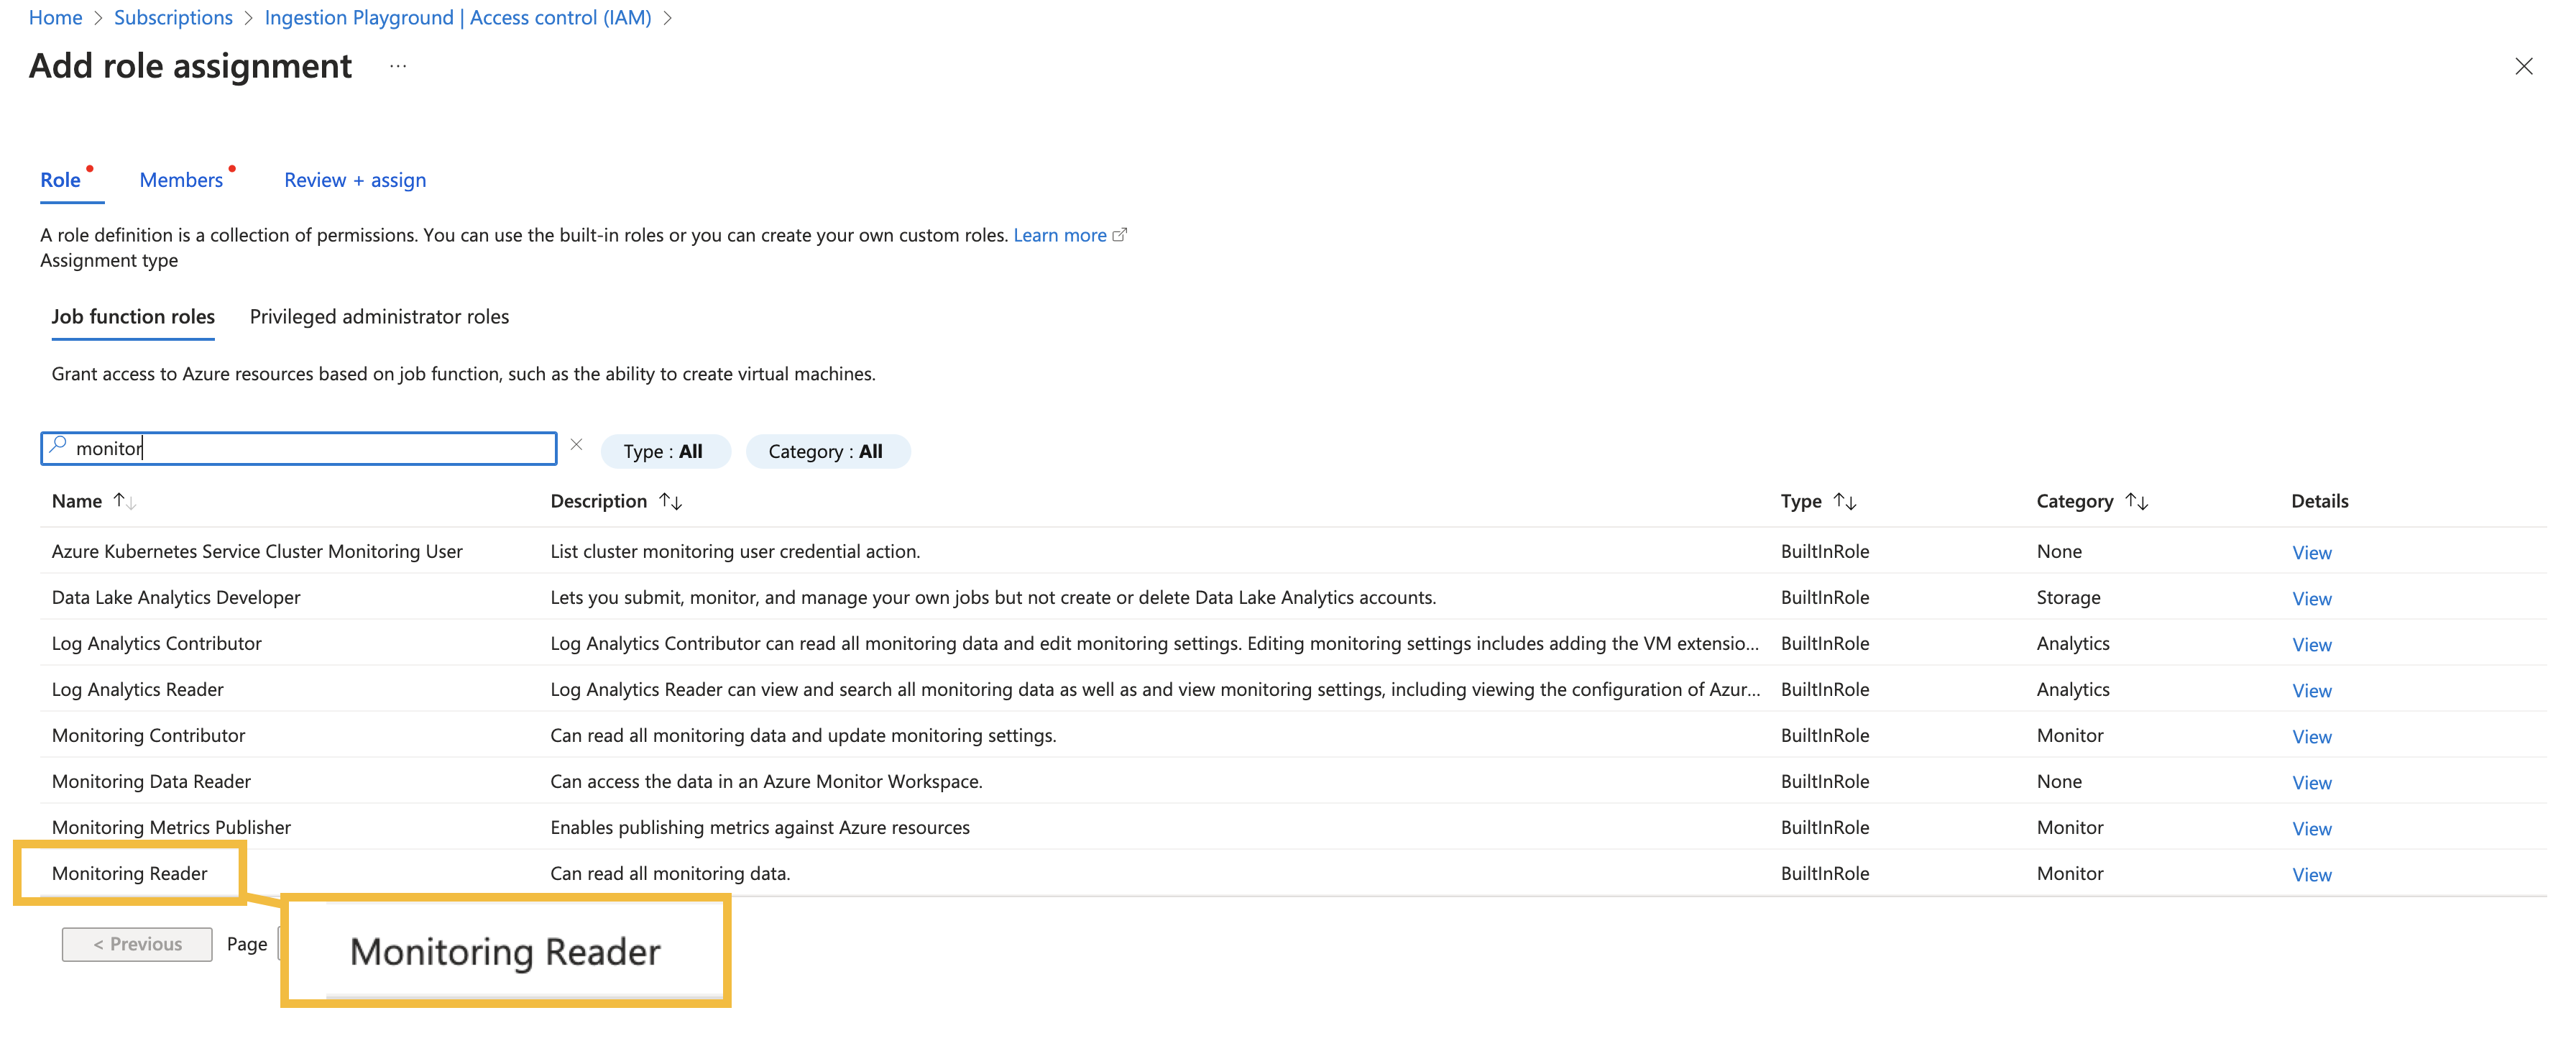
Search for the Monitoring reader role, select it, and click next.
Ensure that the User, group, or service principal option is checked in the Members tab, and click on + Select members.
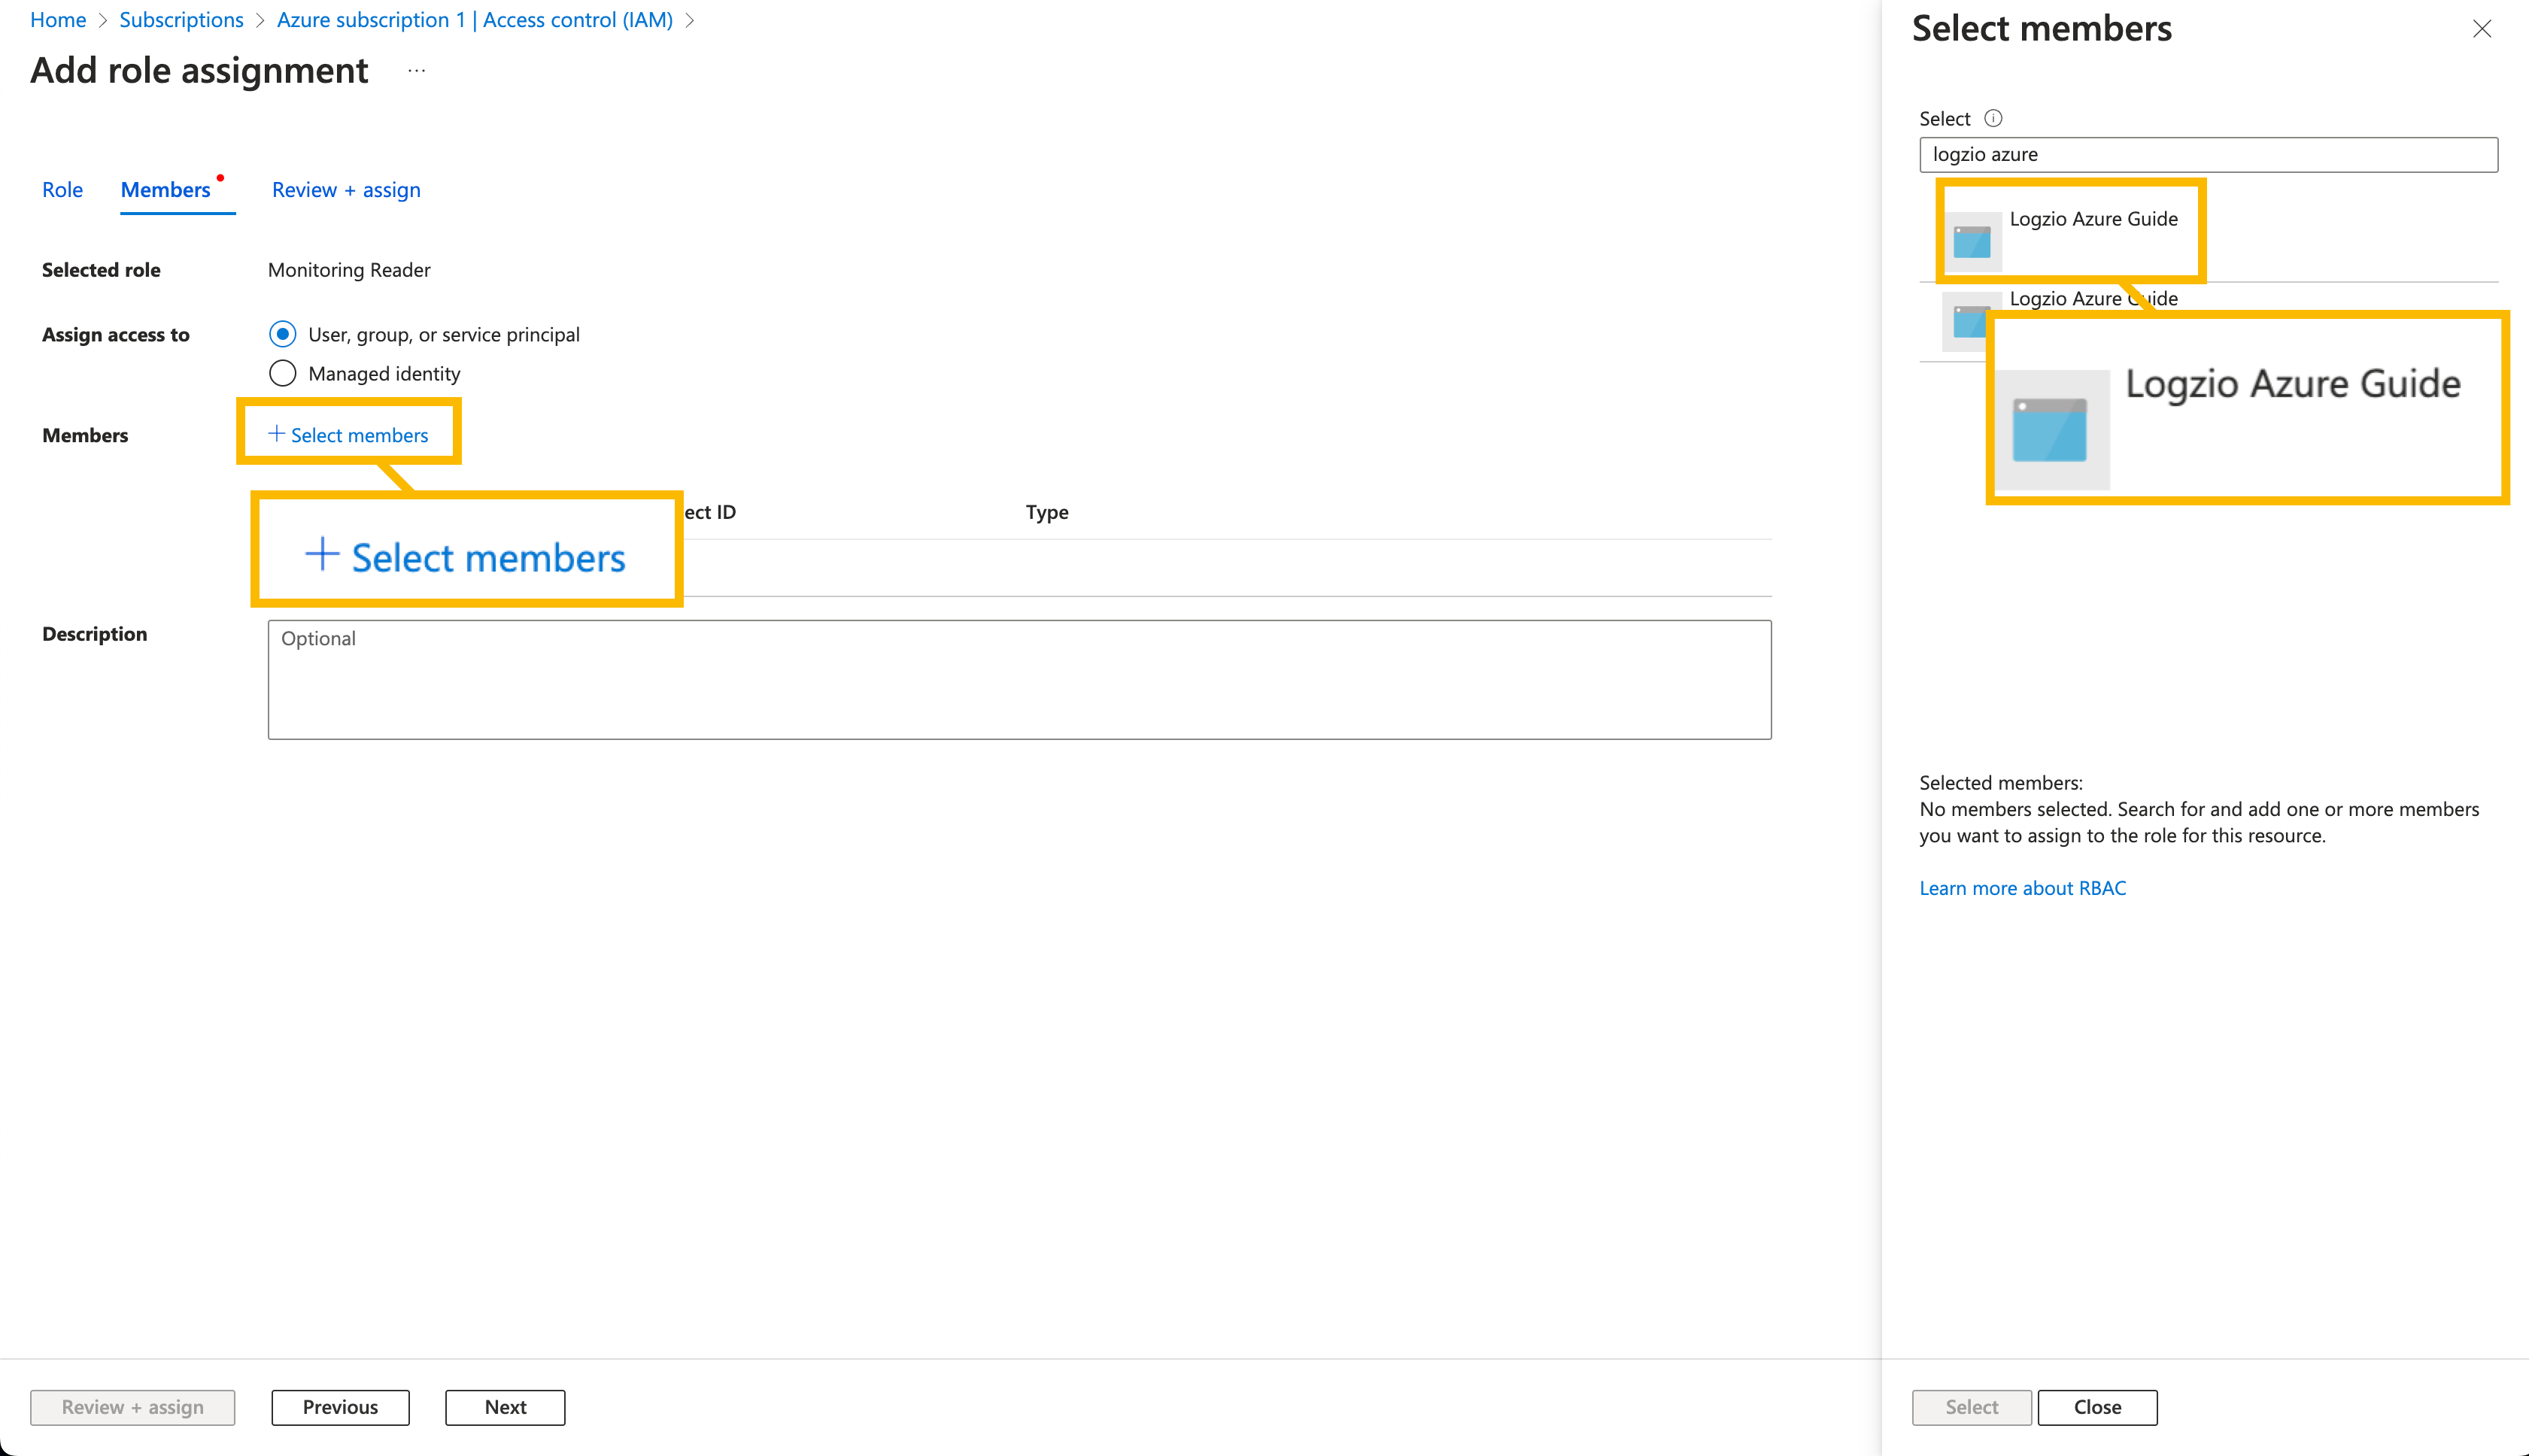
Search for the name of the app you created and select it. Click Review + assign to confirm. Click on Review + assign again to apply the role.
(Optional) - Collect logs with Azure Native Integration
Azure Native Integration collects metrics data by default. If you wish to collect and monitor your logs, you'll need to:
- Create a workspace in Azure
- Ship logs to your log analytics workspace via Diagnostic Settings / Data Collection Rules / Application Insights
You must configure your logs through the relevant settings based on your Azure account. Once configured, Logz.io can collect and monitor the desired logs.
For example, if you have a Kubernetes service, you can configure your logs via Diagnostic Settings.
Navigate to Kubernetes service > Diagnostic settings, choose the storage account you want to enable diagnostics for and click Add diagnostic settings.
Next, choose which log categories to monitor and set up the Destination details to Send to the Log Analytics workspace.
Once you connect your Azure Native Integration with Logz.io, it'll have access to all logs inside the workspace, which will be monitored on your Logz.io dashboard.

Send your details to Logz.io
To connect your Azure Native Integration with Logz.io you'll need to send the following information:
- Client secret value - that you created and copied in the Create a certificate section.
Navigate to App registration and click on the app you created. There, you'll be able to find the following information:
- Application (client) ID
- Directory (tenant) ID

Next, navigate to Subscriptions and copy the Subscription ID:

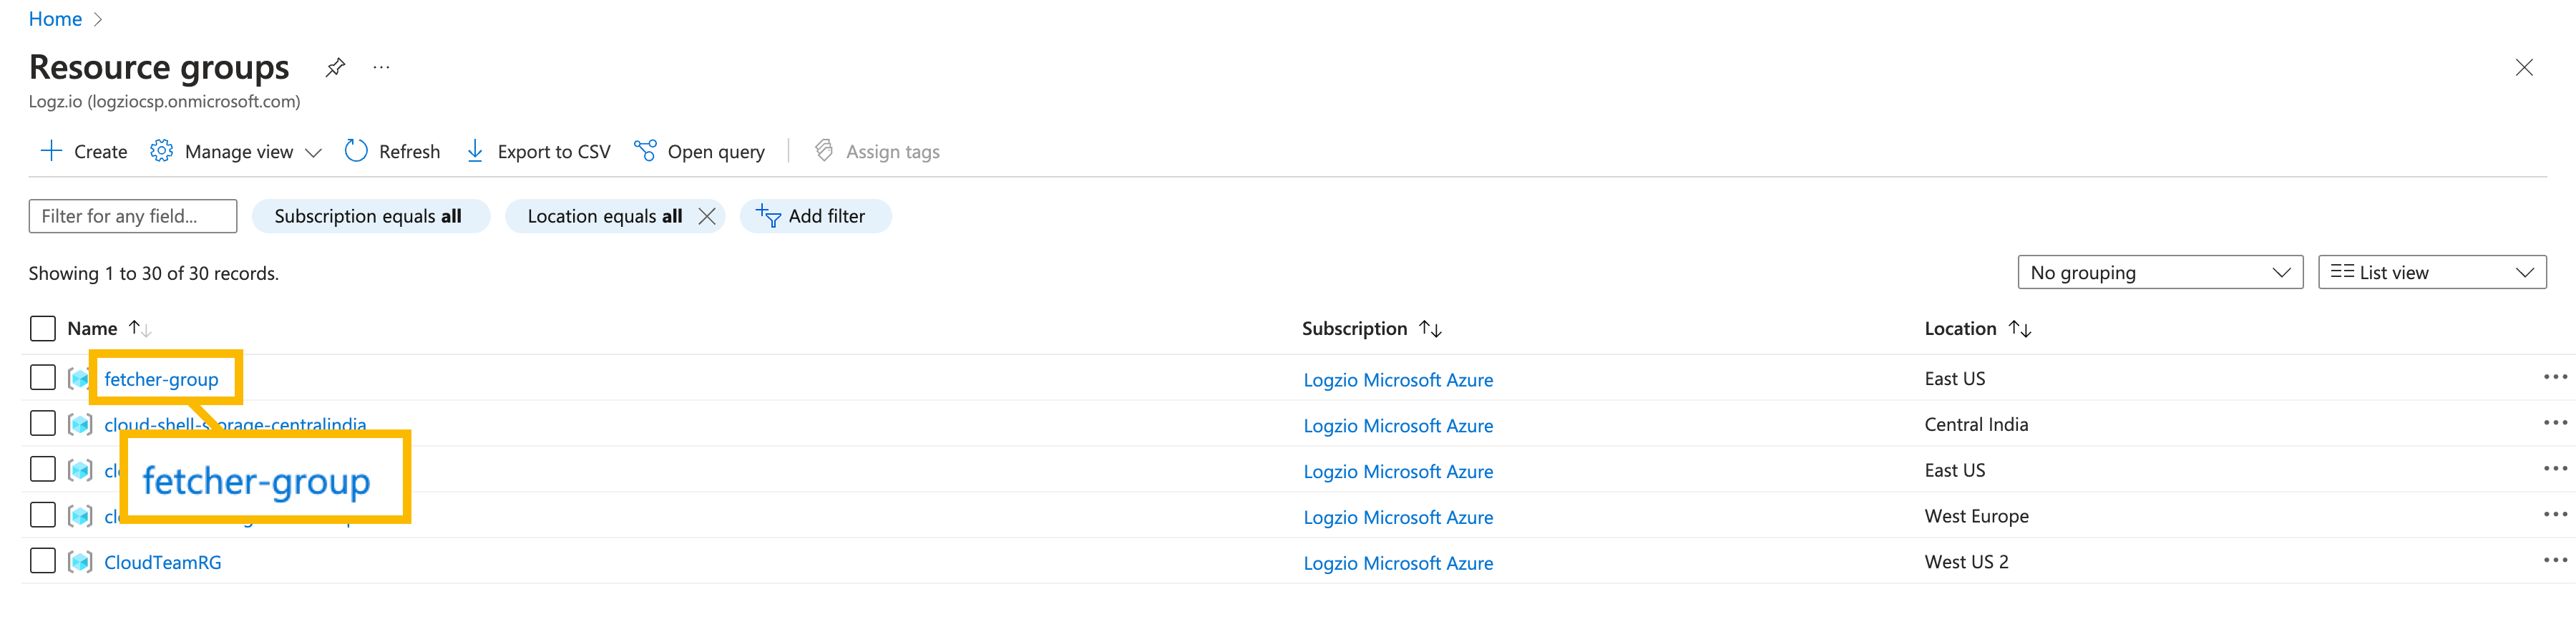
And lastly, navigate to Resource groups and copy the group’s name associated with the app you created. This step is optional.
Set up Logz.io's Azure Native Integration
Once your Azure app is ready, navigate to Logz.io to continue the setup process.
Setup Azure Native Integration integration
Open Logz.io > Integration hub and Choose Azure.

Enter your credentials
Take the credentials you've copied from your Azure app and enter the required values:
- Tenant ID - Your Azure app's directory ID
- Client ID - Your Azure app's application ID
- Client Secret - The value you've copied in the Create a certificate section
- Subscription - Your Azure app's subscription ID
- Optional - Resource group name - The name of the group that's associated with the Azure app you created
- Optional - Tags - You can add tags associated with the sent data for easier analysis and identification
Next, select the resource type you'd like to send. You can select All services to send all resource types of the project or manually add the relevant resources from the drop-down list.
Click Next to continue.

Finish setting up your collector
Finilaze your collector by giving it a meaningful name, adding a description, and selecting which Metrics account you'd like to use. If you don't have an active Metrics account, it will be created automatically.
Click Generate collector to continue.
Activate and run the collector
To get started with Azure Native Integration, toggle the Enable Connection on. You might have to wait a few minutes to see your data.
There is a limitation of three connections.

If you encounter an error and can't enable the connection, click Advanced settings to return to the configuration screen and verify the values you've entered are correct.
Explore Logz.io
Once your Azure Native Integration is running, you can explore and analyze your data through Logz.io's dashboards.